
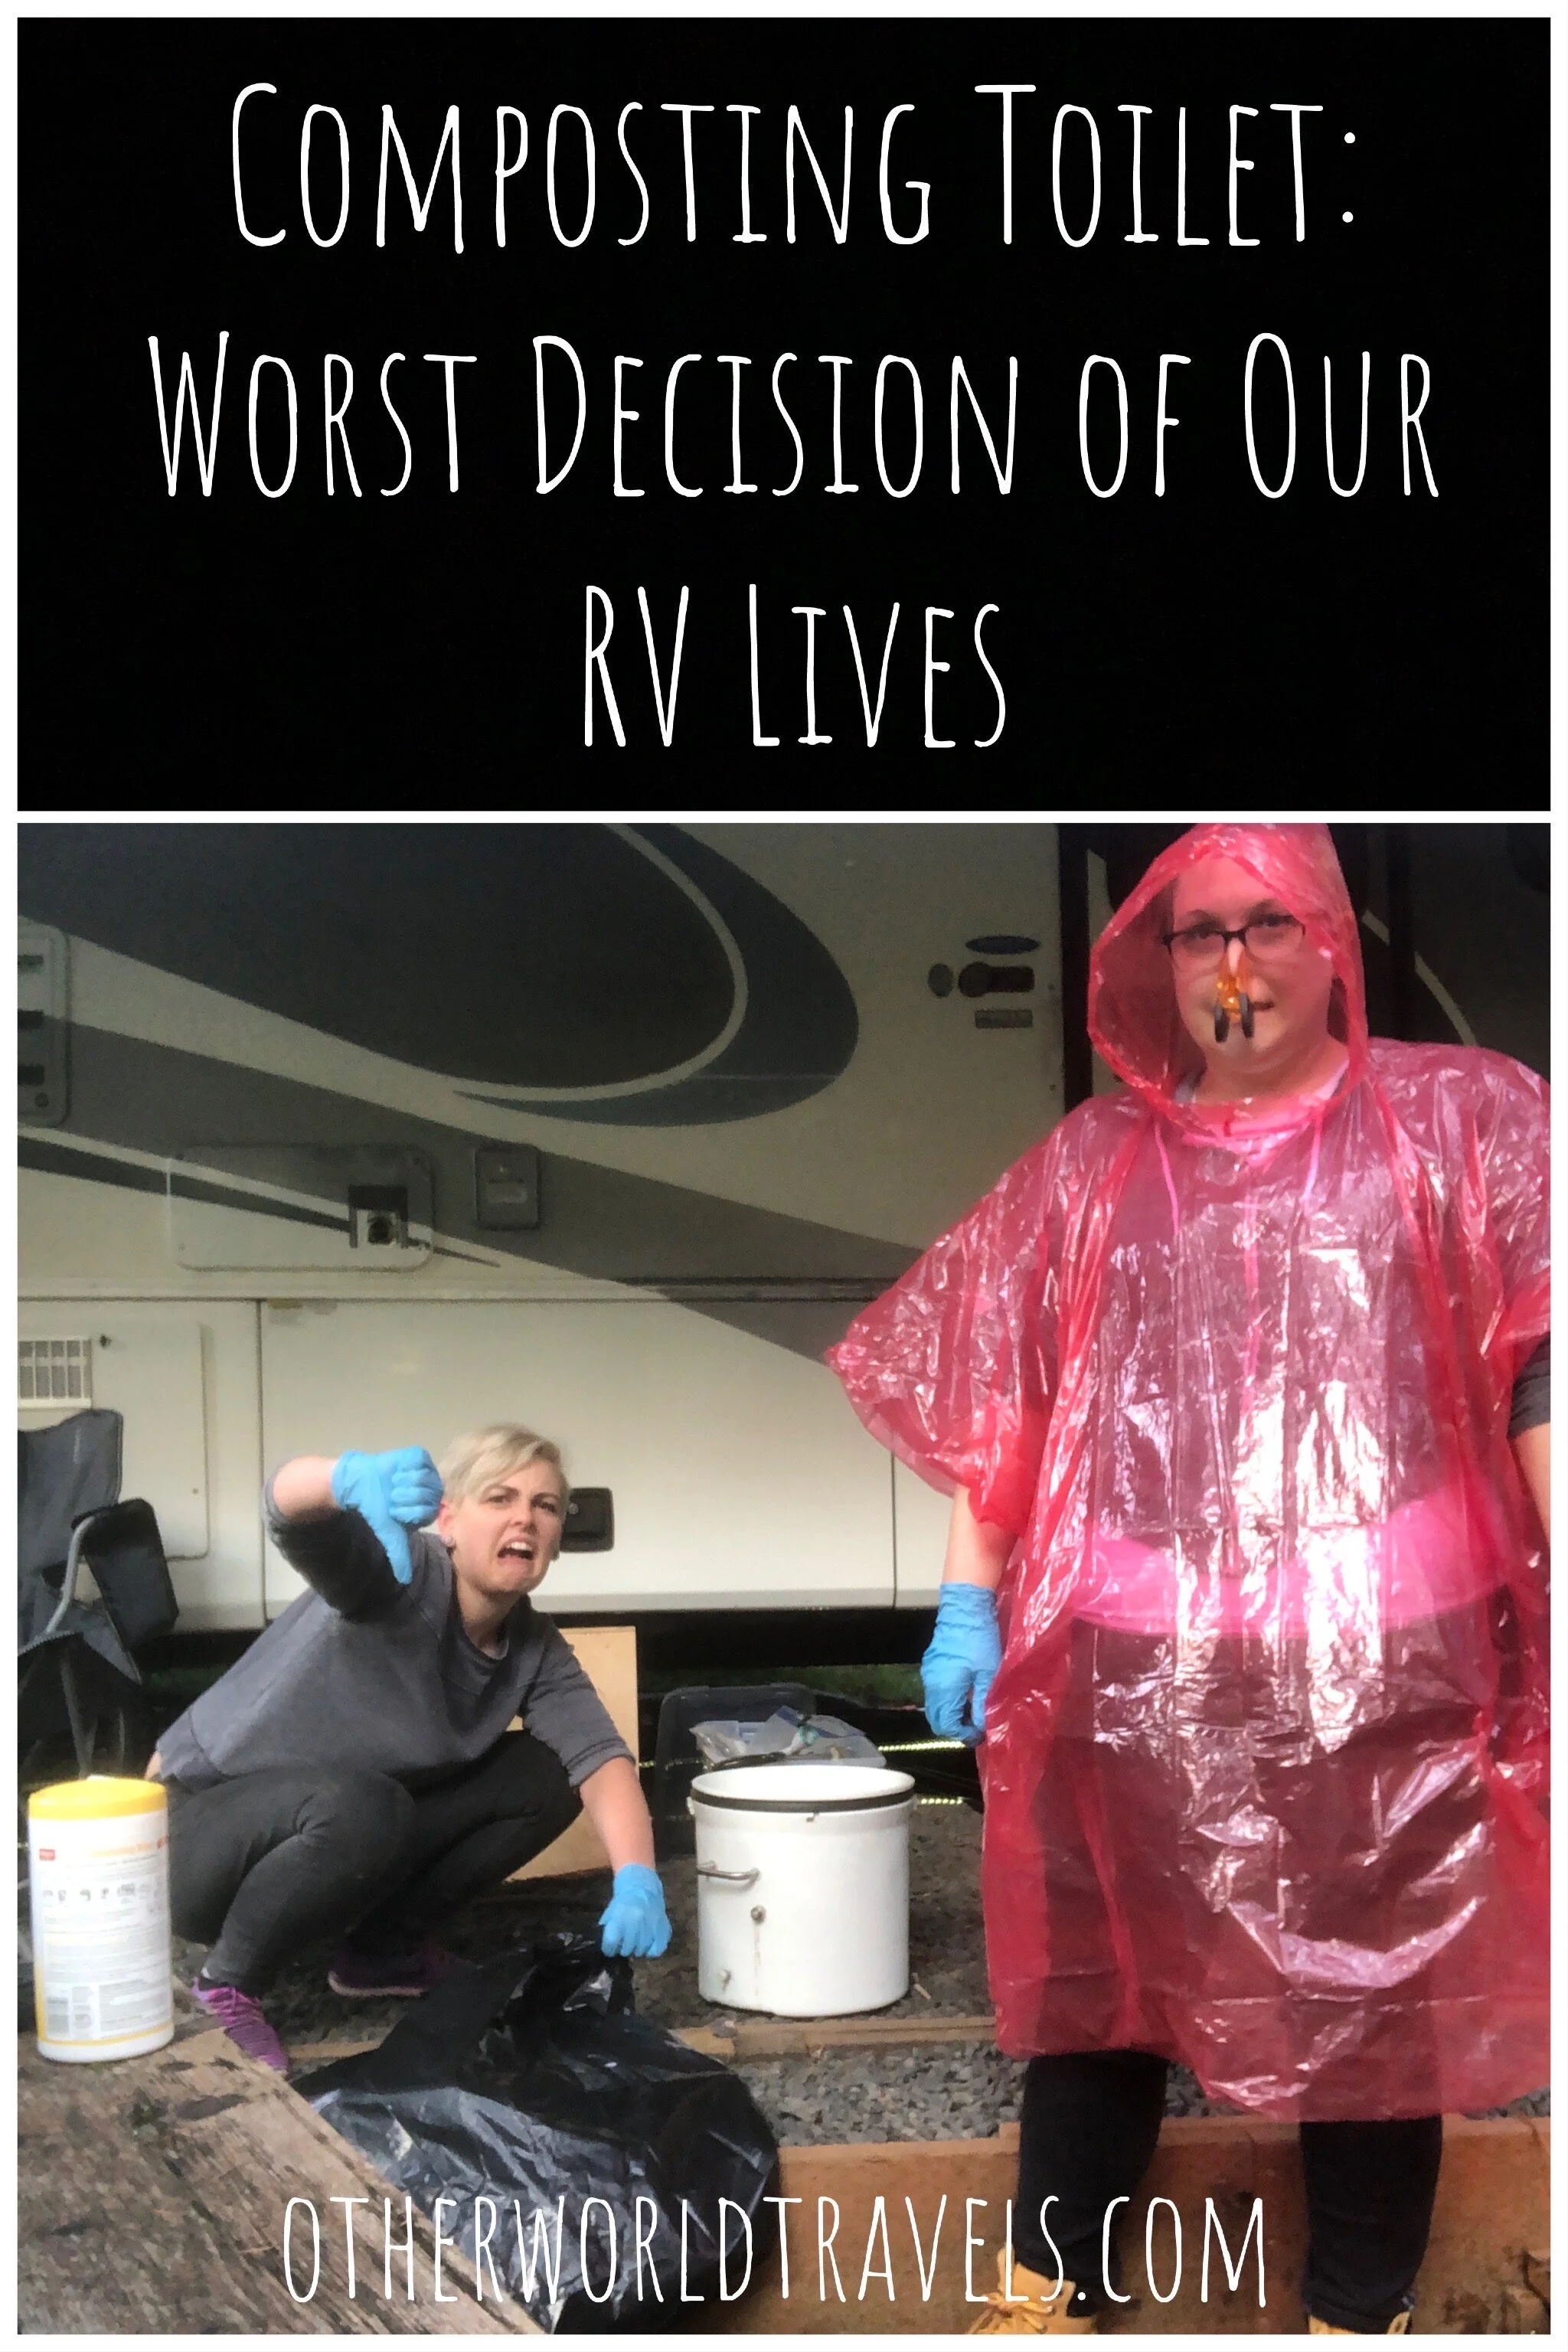
Composting Toilet: The Worst Decision of Our RV Lives
After a year of full-time use, we’ve given up on our composting toilet, officially. Our experience with this highly praised and coveted “off grid solution”, has not been all rainbows and butterflies like others we’ve read about. In fact, I’d say it has been the exact opposite, poo, actual poo.
Please keep in mind, this is just our experience. These toilets work for a lot of nomads, but we wanted to give an honest account of why we chose to go back to a traditional RV toilet.
We researched composting toilets for A LONG TIME before getting one. It was on our radar before we even bought our RV three years ago. You can imagine our excitement when we finally got our little Air Head toilet installed. Why this toilet? Read about how made our decision here.
The appeal: It was the answer to the worst part of RVing… or so we thought, the black tank. Composting toilets promise weeks of worry free usage, no more stinky slinky, and the ability to boondock to your hearts content. This toilet is how we could be more environmentally friendly by reducing water waste.
While some of these notions are true, we were sadly disappointed.
That’s an understatement…
We were let down beyond any of our lowest expectations . We regretted spending so much money on a device that didn’t deliver, leaked, attracted bugs, and yeah it freaking smelled!
But all is not lost, after a year of trying to make it work we are happy to be back to a regular old flush toilet.
So, here are the problems we’ve faced and how we dealt with them. Get ready, we’re sharing all the gory details…
Moisture
This is a composting toilet’s number one enemy, and the first issue we faced. If there is too much moisture getting into the solids tank, you can have a disgusting smelly mess on your hands real quick. Week one went by without any problems, but about half way through week two we noticed it was very liquidy in the back of the tank.
GROSS!
After researching composting toilets for years, we knew exactly how to handle this! Add more coconut coir! So, we added some dry coconut coir to the back and went about our days. One morning, I went into the bathroom and was hit by the smell of diapers. Wait, what?!? I thought there would be no smell. LIARS!! It was bad. It was beyond the “oh just add some dry coir to it” point, so we decided to empty and start again.
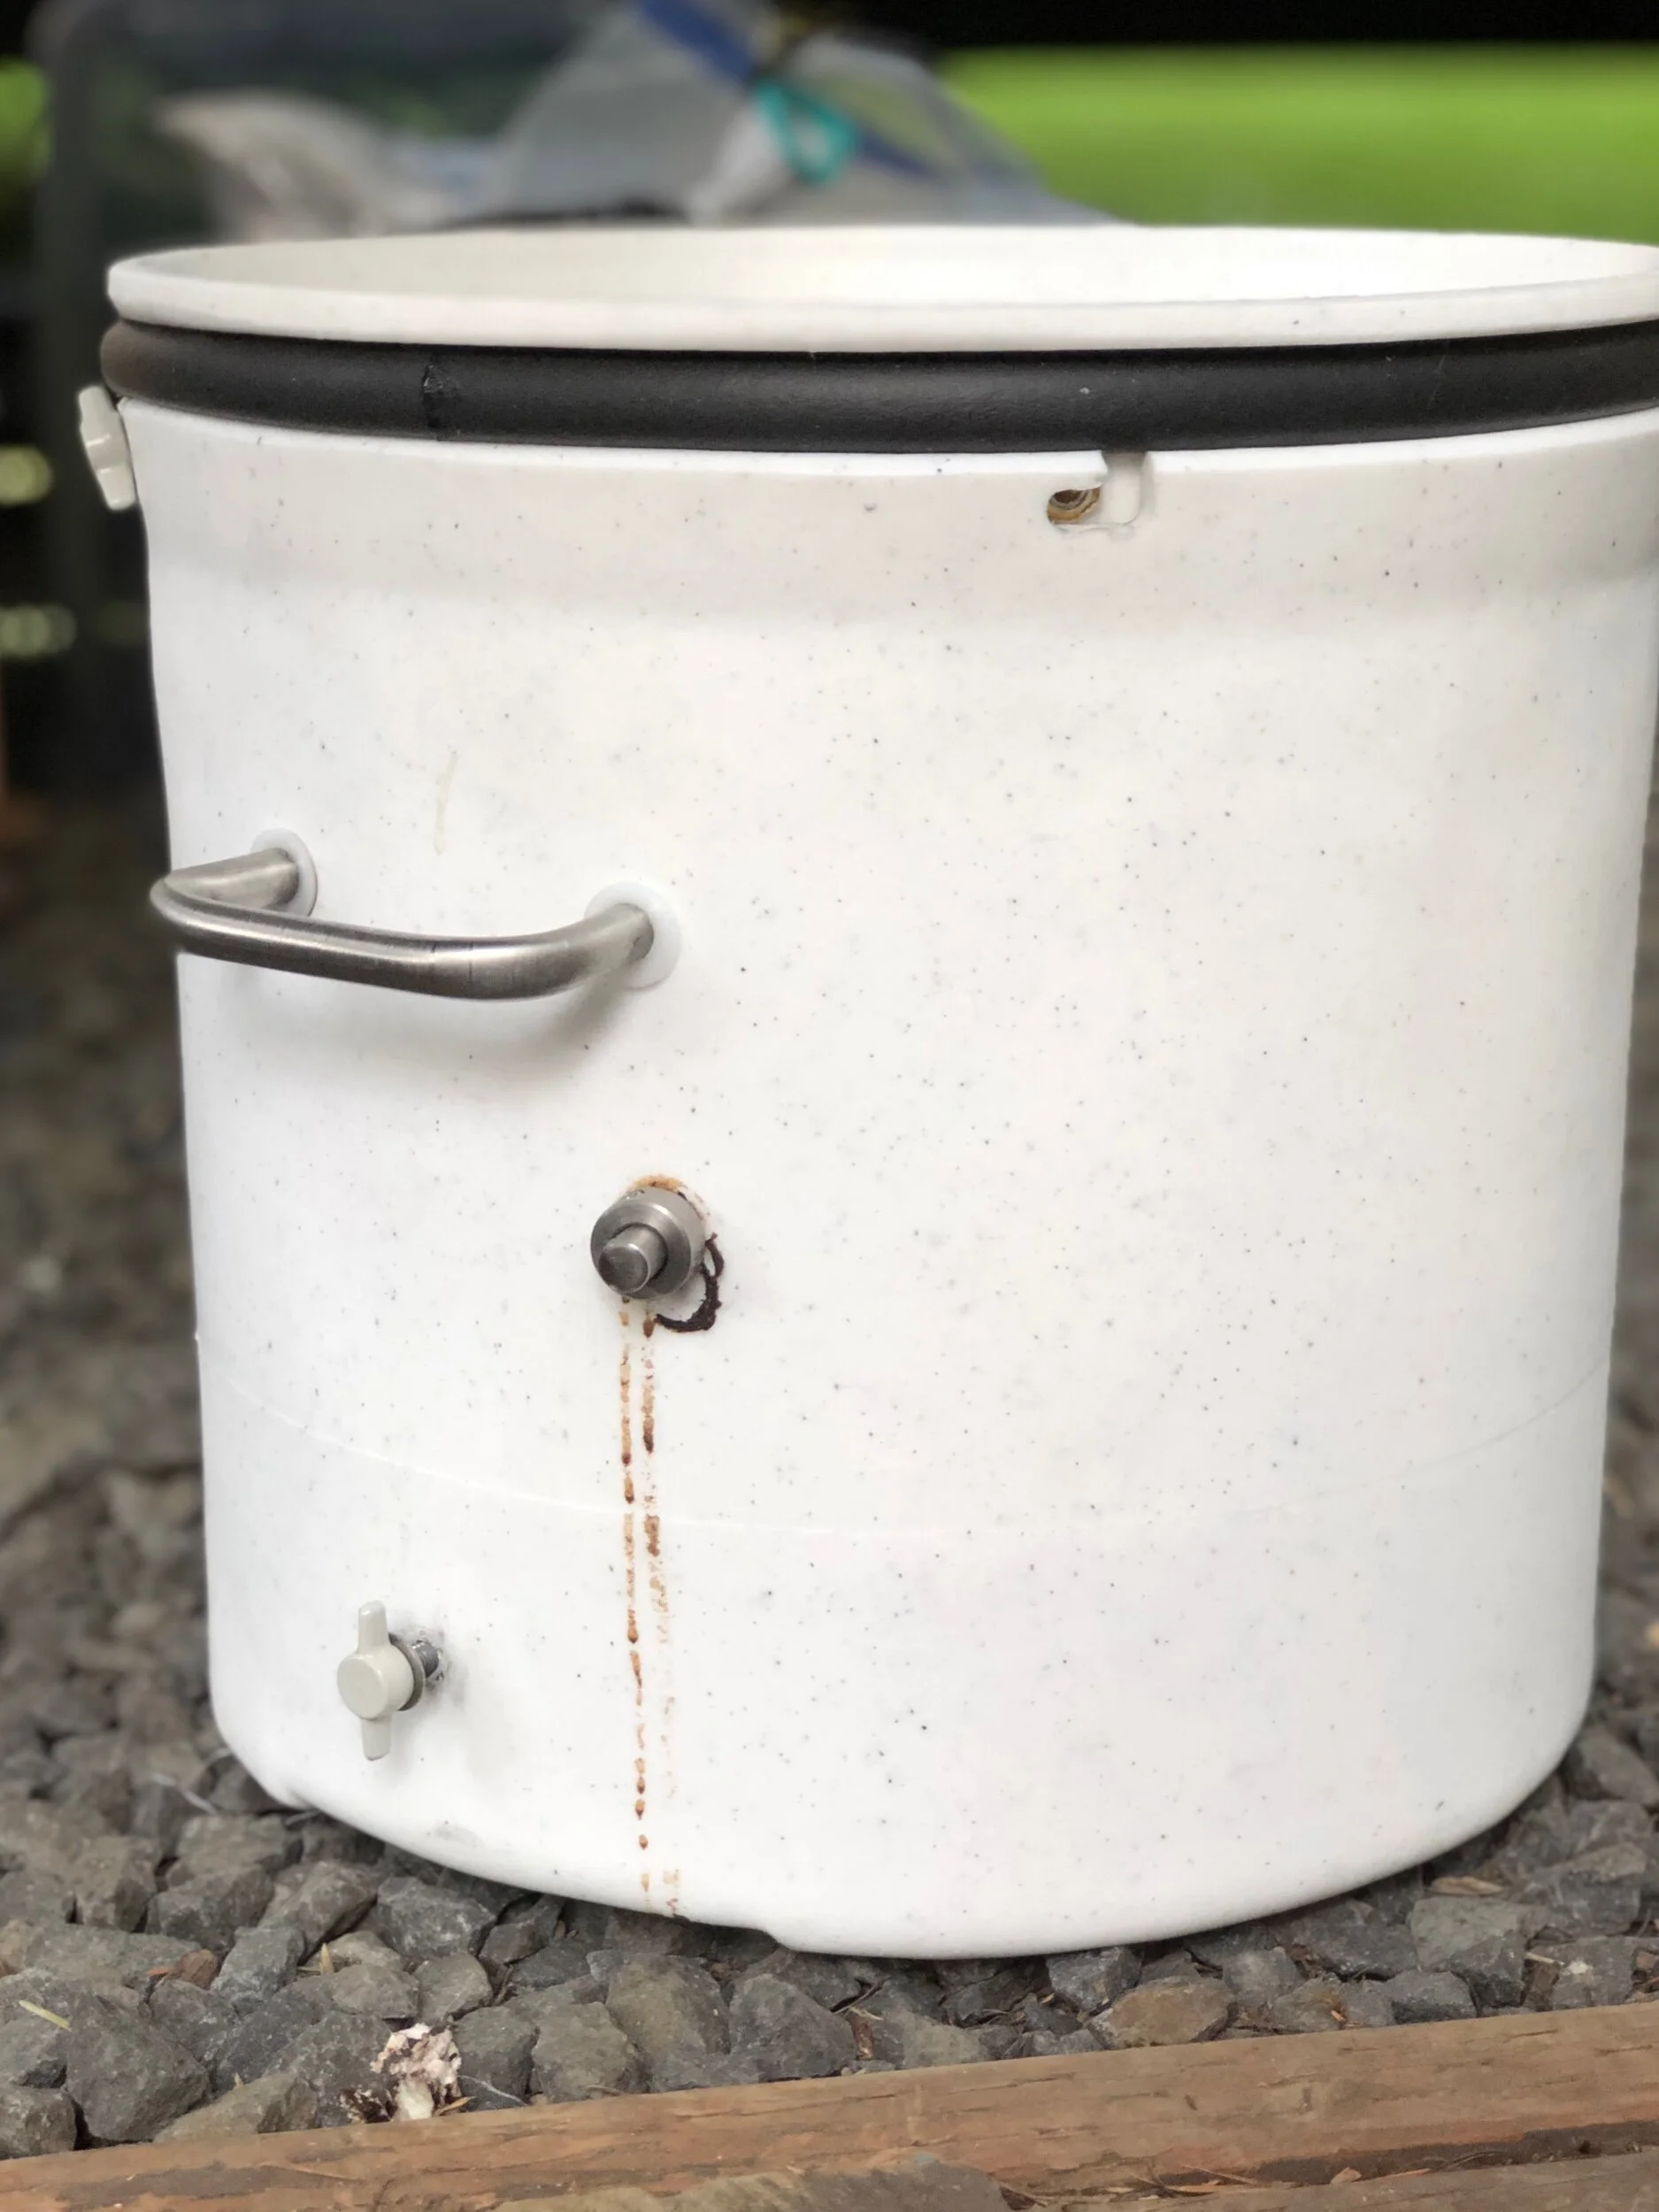
When we picked up the toilet, we were disgusted to find that the solids tank had leaked out of the side where the crank handle attaches and went under the toilet. Well, found the smell! Also, $1,000 for a toilet that leaks?!? Are you kidding me?!
We thought, we’d add less water to the coir (we added about 4 cups the first time). So, we only added one cup of water and got the same results in two weeks. OK, I don’t care if we’re newbies a $1,000 toilet shouldn’t leak. PERIOD!
The (Sort-Of) Solutions
We contacted Air Head, who basically ignored the issue of leaking and gave us some things to try. First off, we weren’t using enough coconut coir (we initially used the brick they send with the toilet). They said for full-timers, you’d need two bricks (or just over half-full). OK fine, we’ll add more coir, but then it will fill faster. (Reply) Yes, it will need to be emptied about every three weeks for two people.
When Air Head didn’t address our leaking issue, we decided to reach out to Nature’s Head (a similar manufacturer of composting toilets). We wanted to know if this was a manufacturing problem. They responded quickly, and we ended up speaking with the guy that designed Nature’s Head. He told us it could be an issue with their toilet as well, and the only way to avoid it is to keep moisture down. He also said that the approximate three week rule was comparable to his design.
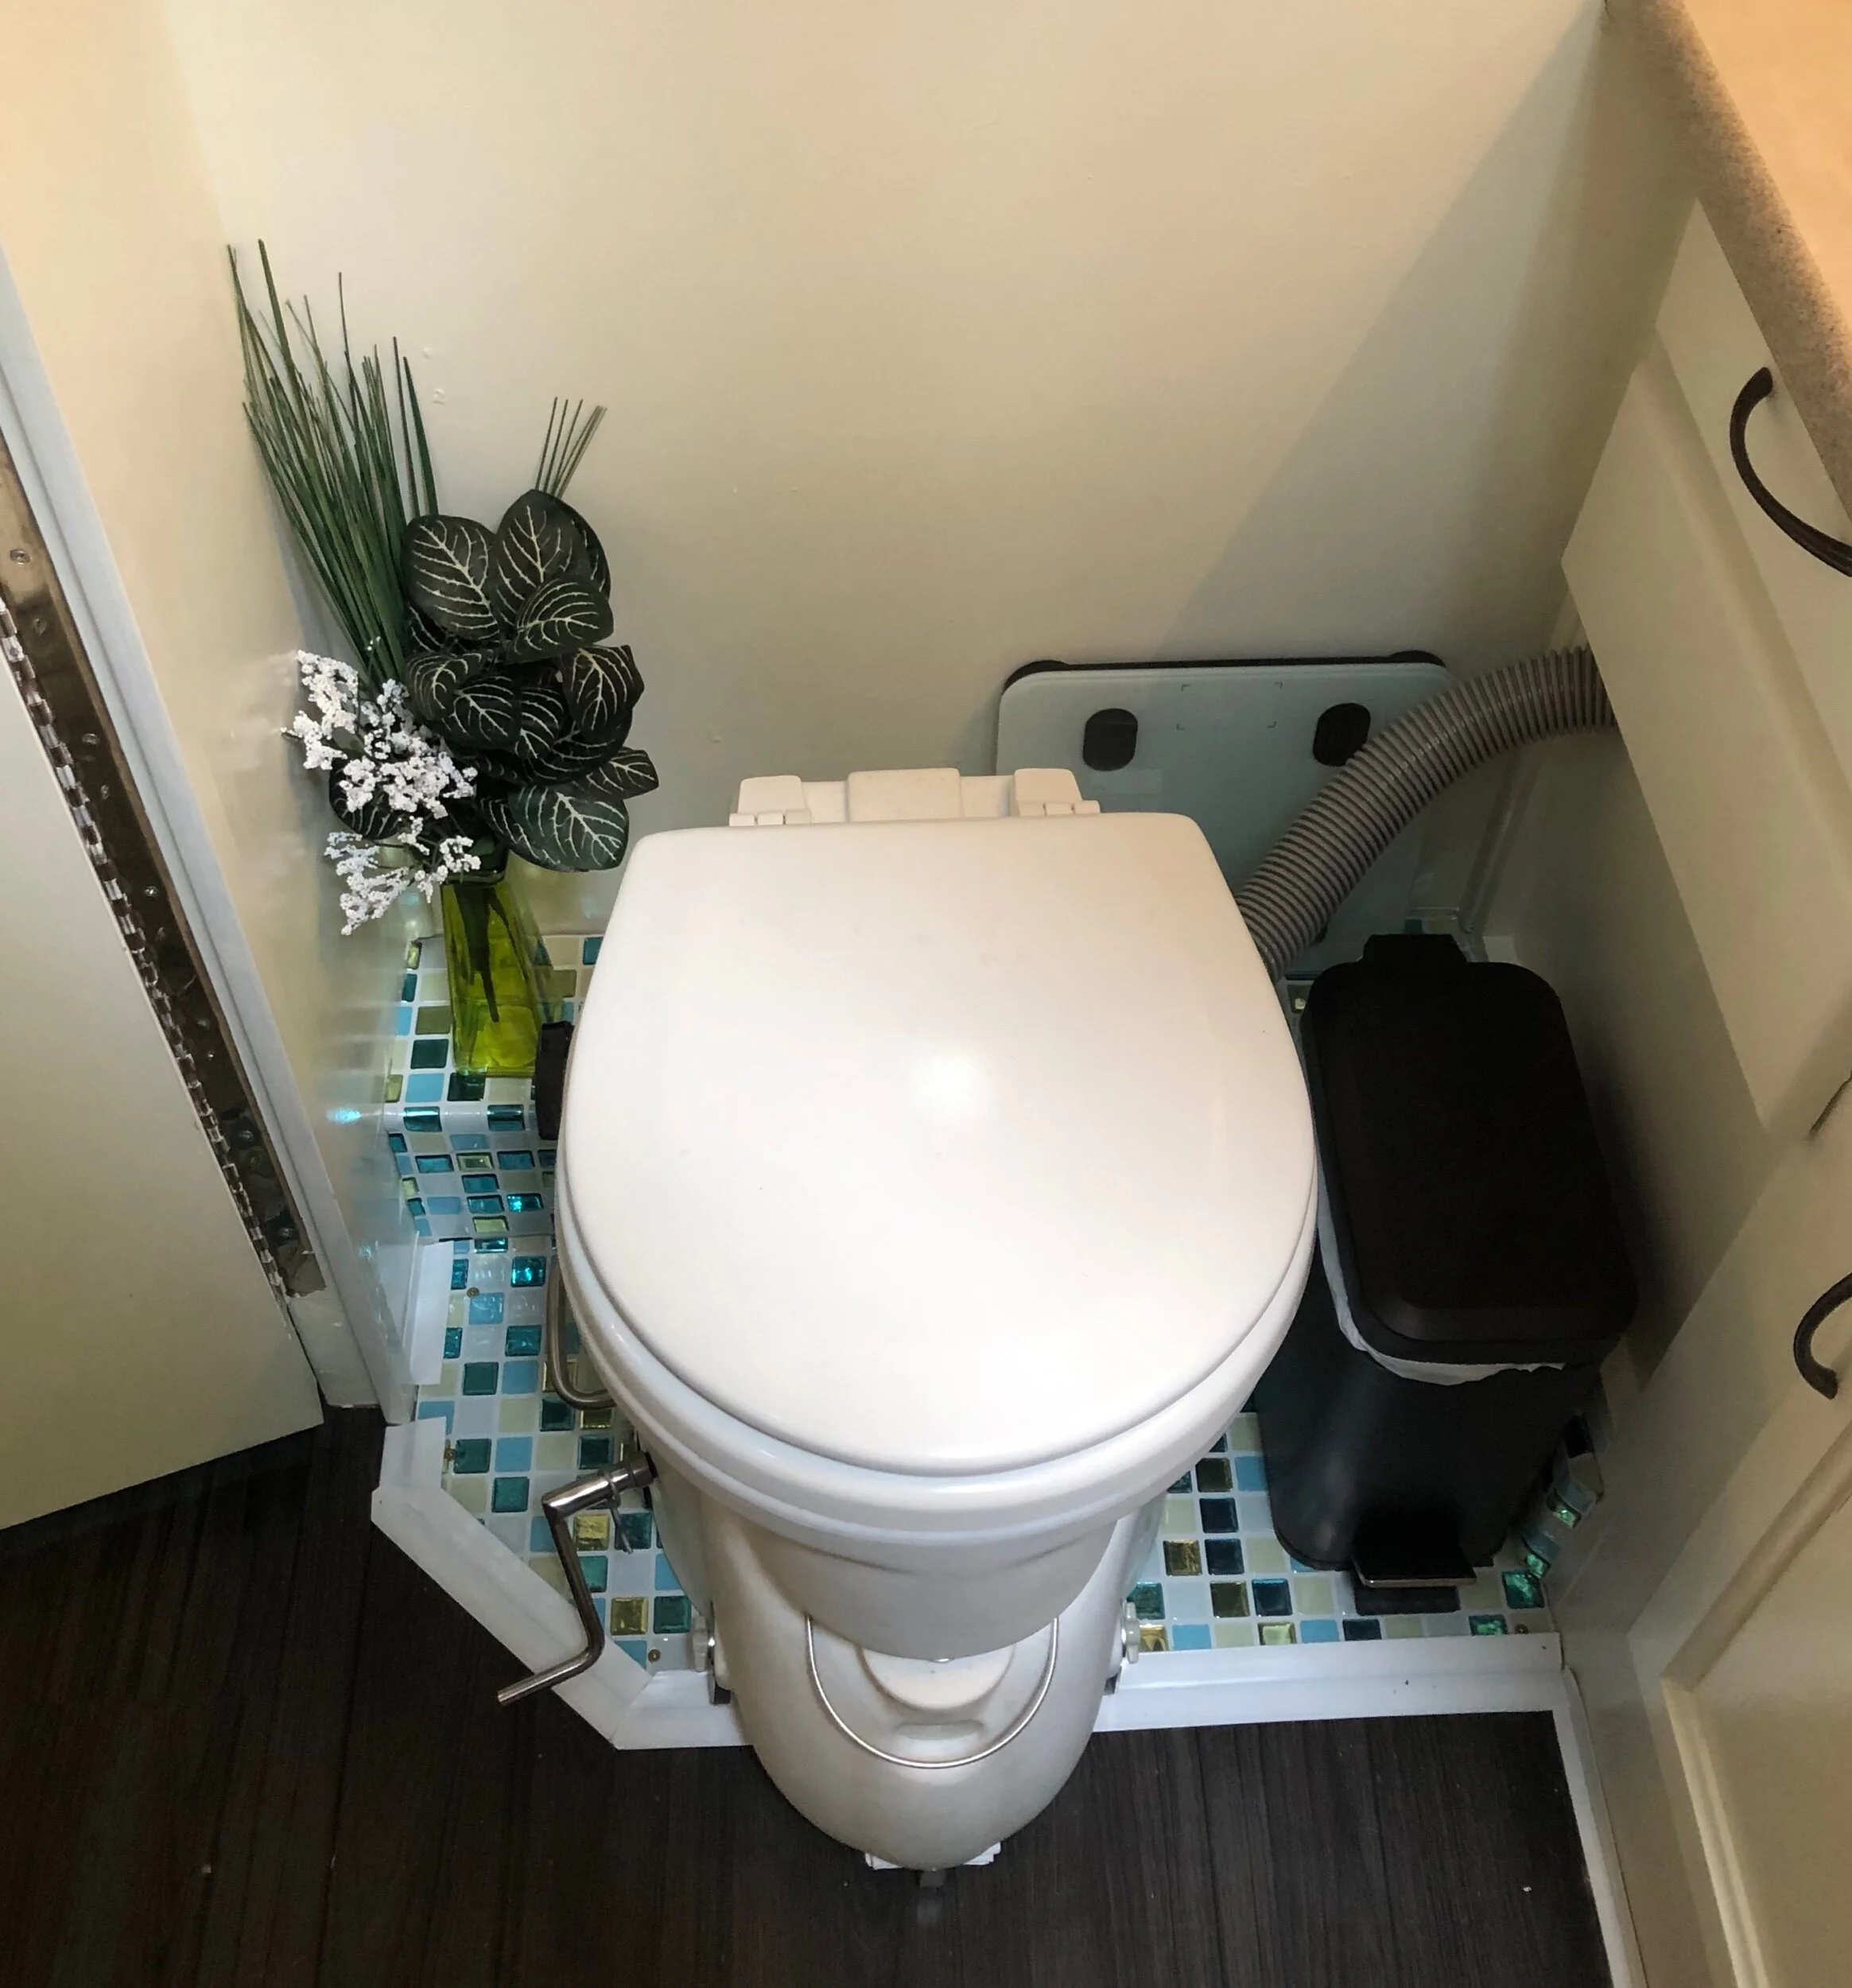
Air Head then had us put a level on the toilet to see if it was tilted forward or backward. It was tilted backward. This is a huge issue, because urine will flow back into the solids tank making your life completely miserable. We put a wooden wedge under the back of the tank so that it leans forward.
Our location was the next issue. We were living in Oregon at the time, so we kept our huge dehumidifier in the bathroom to cut down on humidity.
After talking with Air Head and changing everything we were doing, it got a tiny bit better. Truly, we think the biggest issue was the fact that the toilet was tilted backwards. Of course, the problem with this is that you can’t always guarantee a level RV site. We checked it every time we parked to be sure it was not tilted backwards. Urine still got into the back of the tank, even when it was tilted forward. This seems like a design flaw, but hey I’m no toilet expert…
What Material to Use in the Solids Tank
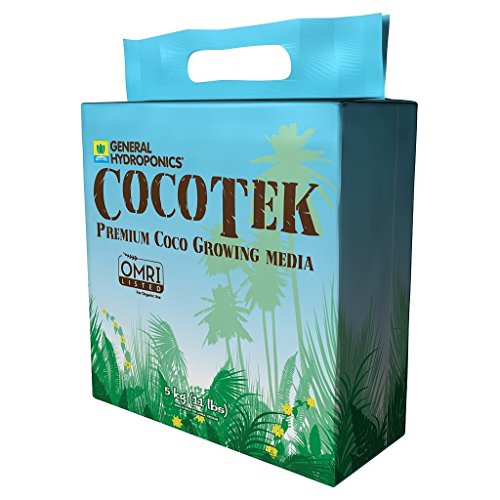
There are only two things recommended for the solids tank: coconut coir or sphagnum peat moss. Coconut coir is what we started with. It’s great because it doesn’t take up much storage room and is better for the environment than other options because you’re using the part of coconuts that get thrown away.
When we tried sphagnum peat moss, it ended up a moldy disgusting mess (in the toilet and in storage). It also comes in a 3 sq ft brick, so good luck storing that in an RV!
Nature’s Head recommended CocoTek Coconut Coir that is easier to break apart. We can take the back end of a hammer and break this stuff apart without using much water, which is great to keep moisture down.
The last few months we used the toilet, we got really experimental. We tried using different types of cat litter, because we are basically using a very expensive litter box. The one we liked the most was Feline Pine. It stayed super dry, and was easy to dump. HOWEVER, it expands a lot! We had to empty it every week when using cat litter. We also tried sWheat Scoop and The World’s Best Cat Litter. These two weren’t as good at keeping things dry as Feline Pine and still had to be dumped every week.
Bugs
I cannot stress this enough… bugs will happen. This is literally a bowl full of compost… it is illogical to say that composting toilets do not attract bugs. Bugs can get in. Bugs will get in.
We had everything installed by the book and yet we still seem to accrue more gnats in our house than we did before we had the composting toilet. For the most part, we keep them under control. It seems to really depend on the location and season more than anything else.
The final blow that caused our decision to give up on the composting toilet was FLIES. During the last month, flies had figured out a way to get into our bathroom through the toilet’s fan. It. Was. The. Worst. I have no solution for this. We had the toilet installed professionally, and I really don’t understand how they got through the bug net and past a fan that is constantly on. They never managed to get into the toilet, but opening your bathroom to 15+ flies is enough to make you think you’ve just stepped into an Alfred Hitchcock film.
Liquids Tank
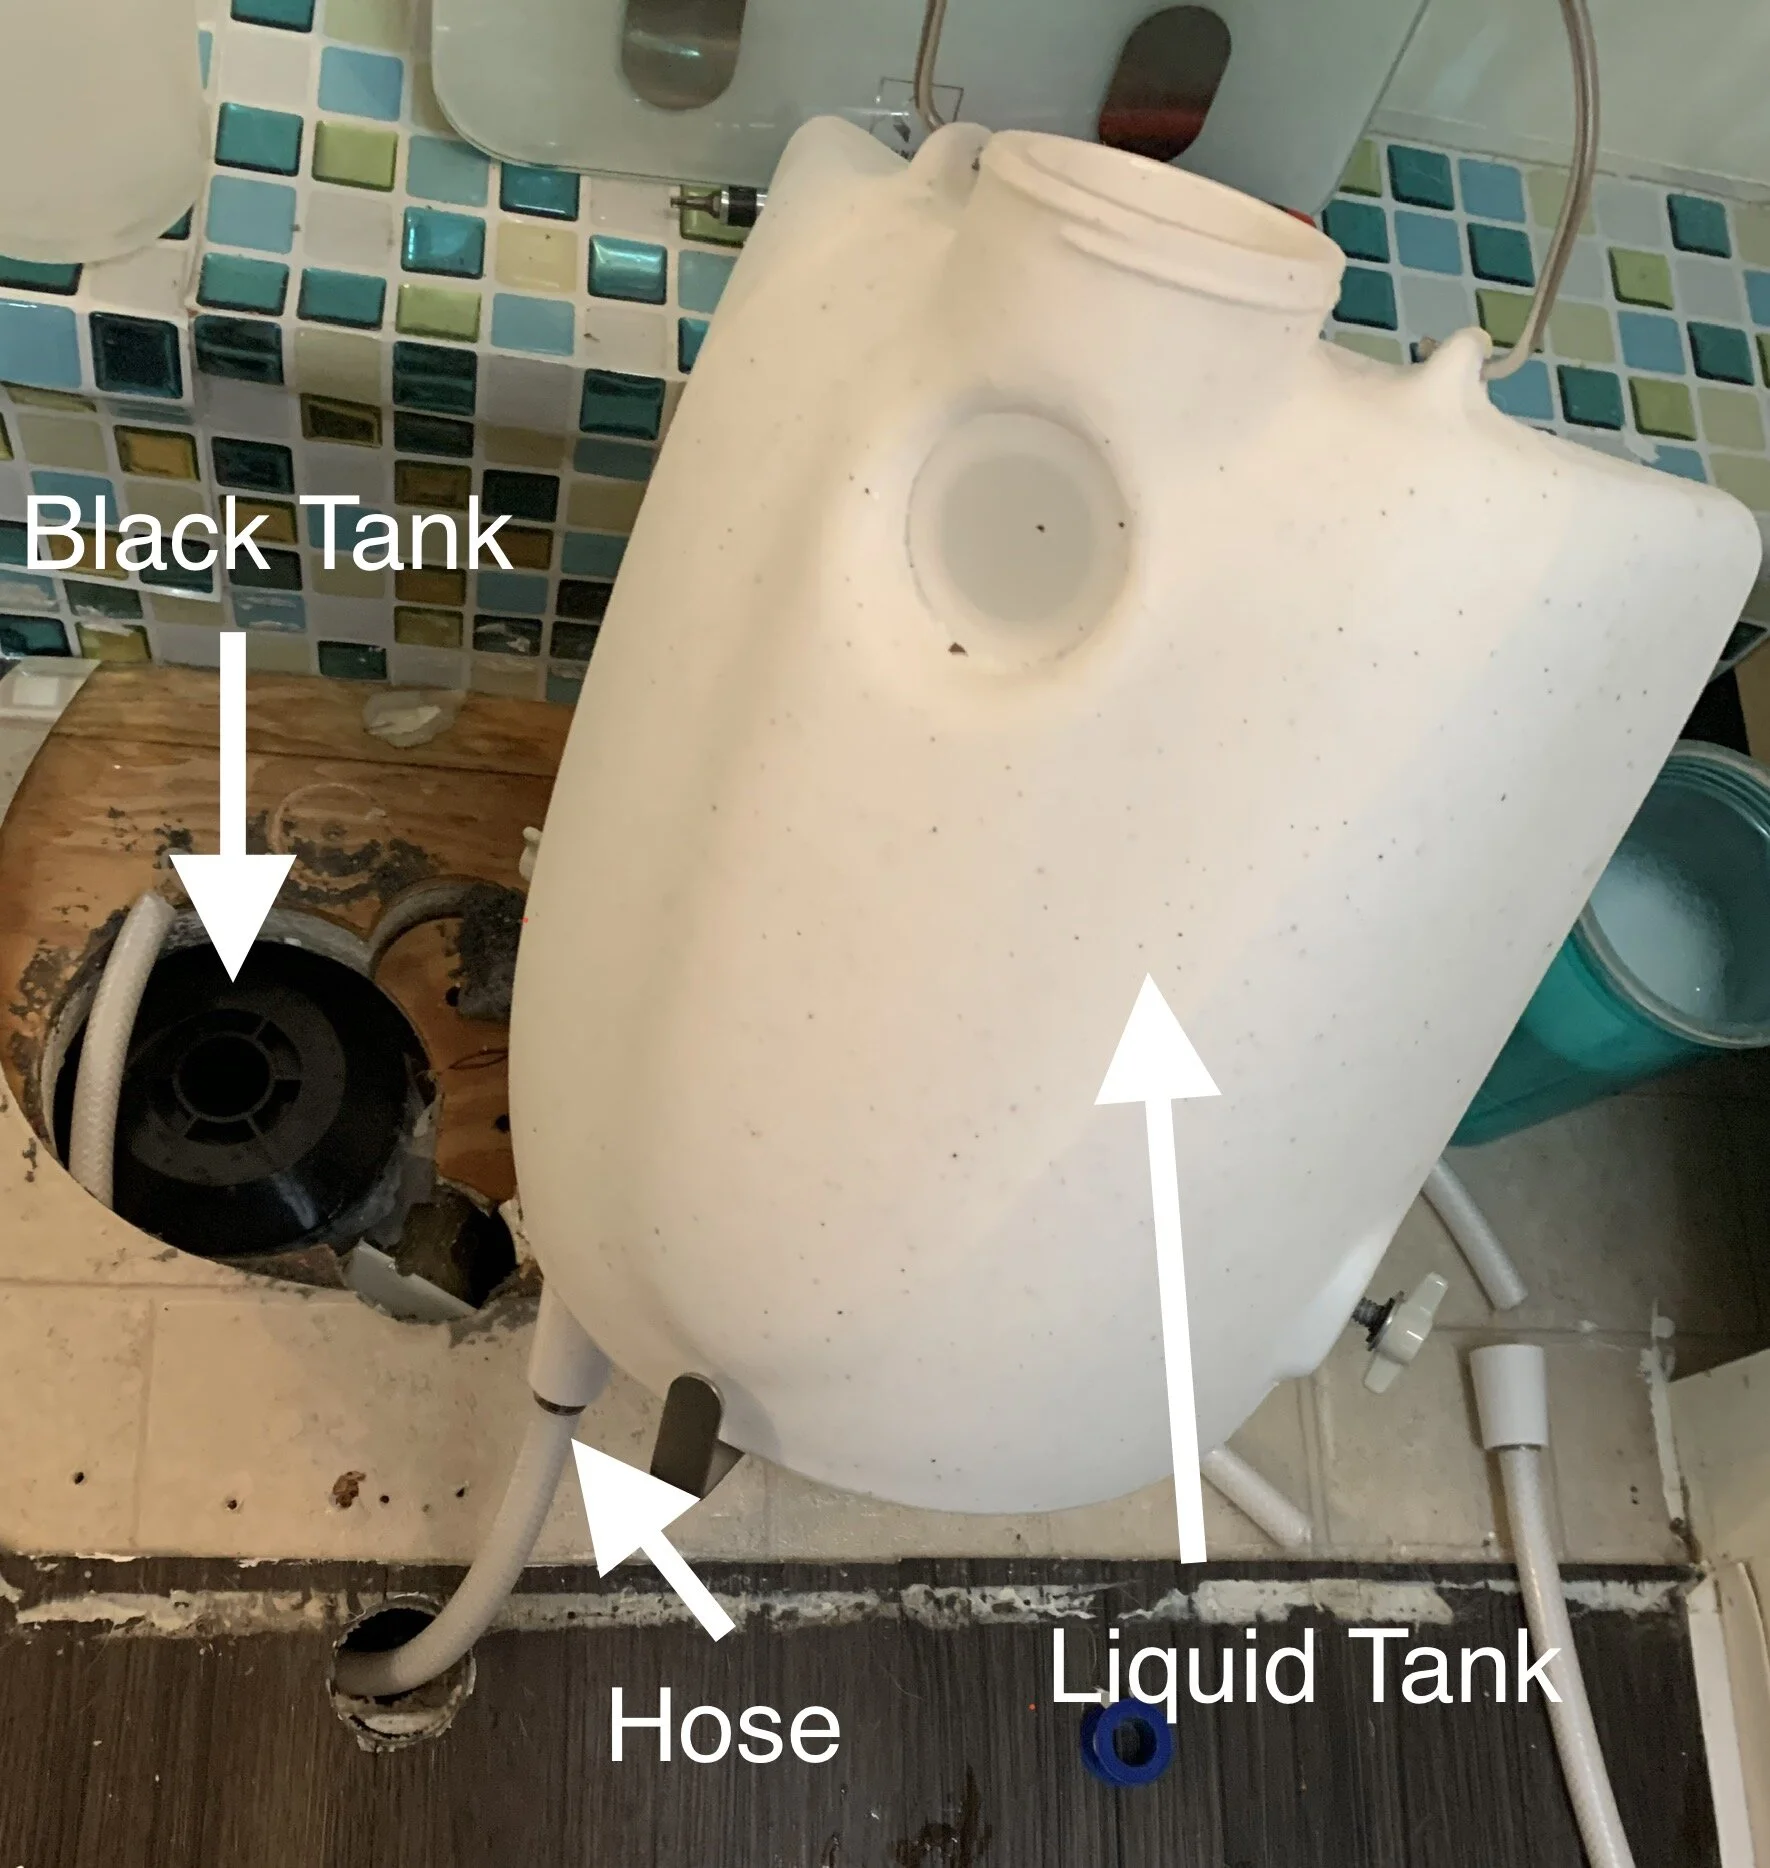
Enough about the gross solids tank, let’s move on to the gross liquids tank! We made a mistake when we purchased our toilet and opted for the small one gallon tank. We only had a small space, and didn’t know if the larger tank would fit. We emptied this thing about 3 times a day, and were so paranoid about it overflowing (yes it happens) that sometimes we’d empty it more.
Our solution to this was to route the liquids to the black tank. Air Head makes a tank with a connection on it that can be attached to a hose and then routed right into your black tank (creating a yellow tank). This worked great for about a month. Toilet paper will inevitably get into the liquids tank and cause a clog into the small line the runs into the black tank. Guess what, it’s a disgusting pain to clean out.
Cleaning
Cleaning the toilet isn’t too bad, for some people’s standards. The bowl can be wiped with sanitizing wipes. The solids tank doesn’t require cleaning out- just dumping. It’s recommended not to clean out this part too much because it will help the compost. Of course, dumping isn’t always easy. Just know that you’re going to see some things you wish you hadn’t. The Air Head toilet agitator doesn’t reach the bottom so there is about 2 inches of coir that sits being wasted.
The liquids tank will get gross and needs to be cleaned. Urine builds up over time and smells horrible. It’s not an easy task. We sprayed vinegar in it every time we emptied and then wash it out as best we can once in a while. This keeps the odors down somewhat.
The Positives!
It sounds like we really hated our toilet, and well, we pretty much did. To be fair, some days we really hate our black tank too. When we were on long trips, the Air Head is helpful. We didn’t have to turn the water pump on and we didn’t have to worry about dumping every week. We could also use whatever toilet paper we want! Single-ply breaks down the best in the back of the tank, but we didn’t notice that much of a difference from brand to brand. This really came in handy during The Great Toilet Paper Shortage of 2020.
We were even able to take a work-camping gig that didn’t have sewer hookups, because the grey water was just dumped on the ground. That’s a pretty big bonus if you work-camp, like us! There are a lot of jobs that don’t have sewer that we are fine passing up.
So, that’s our experience in a sh*t-covered nutshell. If you want to buy our composting toilet (all clean and sanitized) please let us know, serious inquiries only!